Troubleshoot Error 1712 when installing QuickBooks for Desktop
Error 1712 is associated with the QuickBooks Desktop when users try to install the desktop software in a corrupted folder or Operation System. It is essential to troubleshoot QuickBooks Install error 1712 before it damages your company file or other important files. This blog will be an ultimate guide to fixing error 1712. So, keep reading!
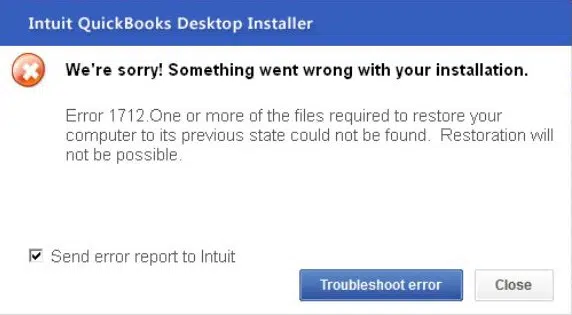
You
might see the following error message on your desktop screen:
Causes of QuickBooks Error Code 1712
Let’s
first understand various causes of QuickBooks Error Code 1712 before
going through probable methods and solutions to troubleshoot this issue at the
time of installing QuickBooks Desktop:
·
When users try to install a new version without removing the older
version of QuickBooks.
·
The QuickBooks registry may be corrupt.
·
Your system might’ve been struck by malware.
·
An attempt to install a corrupt or duplicate QuickBooks package.
·
Some unwanted changes in software within the system.
Symptoms of QuickBooks Error Code 1712
People
can make sure that they are facing an QuickBooks Error Code 1712 by
cross-checking with the following symptoms:
·
The display screen turns blue.
·
Error while giving input or getting an output.
·
The screen and function of the QuickBooks Desktop freeze.
·
Issues with “Shutdown” and “Restart” of the system.
·
Error with HTTP.
Solutions to fix QuickBooks Error Code 1712
Users
can try out the following solutions to fix QuickBooks desktop install error
1712:
Solution 1: Terminate all the processes in the Task Manager
- Press the “Ctrl+Shift+Delete”
key combination.
- Out of all the options,
select “Task Manager.”
- In the “Task Manager”
window, switch to the “Processes” tab.
- Select the processes/programs
to end and then tap on “End Processes” in Task Manager.
- After ending the processes,
reboot your system.
Method 2: Track Application Data in Registry
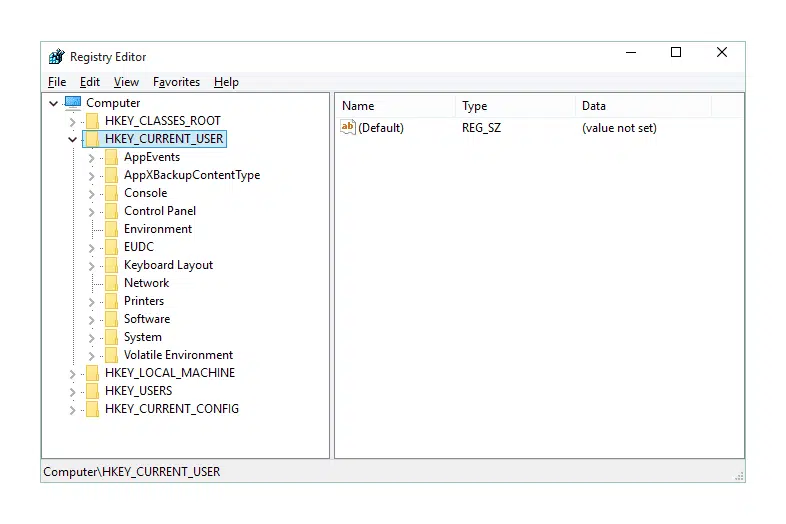
- Go to the “Registry
Editor,” which can be found by typing in the “Start” menu’s
search bar.
- In the “Registry Editor”
window, look for “regedit.exe.”
- Now, enter the path:
HKEY_CURRENT_USERSSoftwareMicrosoftWindowsCurrentVersionExplorerUser Shell
Folders.
- Tap on the “Entry AppData”
twice.
- After hitting on “Entry
AppData,” change the “Original Value” with the “Local
Profile Path.”
- Finally, restart the
“QuickBooks” and look for errors.
Method 3: Use QuickBooks Tools Hub Program
Step 1: Run the Quick Fix My Program feature of QuickBooks Tools Hub
·
Download or install the QuickBooks
Tools Hub
by logging into the QuickBooks Desktop.
·
Open the QuickBooks Tools Hub from the icon present on the desktop
after the installation.
·
In the app, go to the “Program Problems.”
·
Opt for the “Quick Fix my Program.”
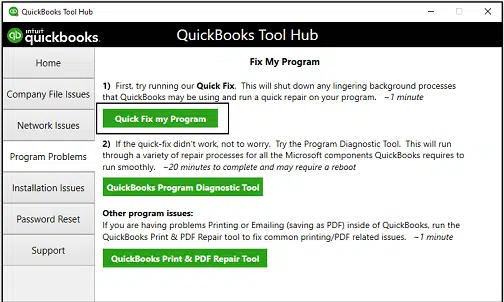
· After completing auto-repair, close the Tools Hub and try reinstalling the “QuickBooks” desktop app.
Step 2: Use QuickBooks Install Diagnostic Tool from Tool Hub
·
Open the tool hub program and switch to the “Installation
Issues” tab.
·
Under this tab, opt for the “QuickBooks
Install Diagnostic Tool” option.
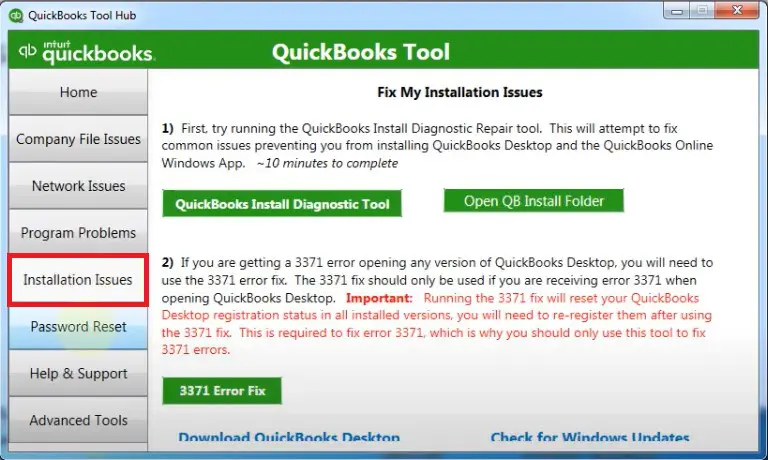
·
Download and install “QuickBooks Diagnostic Tool Hub.”
·
Close all the background apps and run “QuickBooks Diagnostic
Tool Hub.”
·
Now, look for “I am having problems installing QuickBooks”
and hit the “OK” tab.
·
End all the processes and reboot the QuickBooks Solution Desktop
App.
Method 4: Provide Admin Rights to the QuickBooks Software
- Go to the “Start”
button and search for “Control Panel.”
- Head to the “User Account”
in the Control Panel.
- According to the version of
QuickBooks version, look for QBDataServiceUserXX.
For example: For QuickBooks Software 2020, you’ll have to look for QBDataServiceUser30. - Under the “Change Account
Type’ option, choose “Administrator.”
- Hit on the “Apply”
button and save all the changes.
Method 5: Reinstall the QuickBooks Desktop
- Press the “Start”
button on the “Control Panel.”
- In the “Control Panel,”
click on “Programs/Features.”
- Select the current version of
QuickBooks you are using and Uninstall it.
- After uninstalling the app,
go to the official website of QuickBooks.
- Go to the “Downloads”
section and download the premium edition according to the technical
requirements of your system.
- Again, follow the
installation process step-by-step and carefully every detail.
Method 6: Look for the Windows Update
- Head towards the “System
Settings” from the “Start” menu.
- Now, choose “Update and
Security.”
- Go to the “Windows Update”
tab.
- Check for any available
updates, and if available, download and install them.
- After installing the updates,
restart your system and open the QuickBooks Desktop.
Conclusion
This
blog has discussed all the possible reasons, symptoms and methods to troubleshoot QuickBooks error 1712. One
of the primary reasons behind this error is when users try to install the
QuickBooks desktop in a corrupt file or folder. Troubleshooting this error is
essential because it reduces your system’s overall performance.
We
have put every possible solution in this blog, such as terminating all the
tasks in the background, using the “QuickBooks Diagnostic Tool Hub,”
reinstalling and updating the “QuickBooks Solution Desktop App,” and
much more.
Suppose
users still face any problems or issues while using the application. In that
case, they can also contact the QuickBooks error
support
team on our helpline i.e., 1-800-615-2347.


Comments
Post a Comment