How to Connect Your Email to QuickBooks Desktop?

Users can quite easily connect their email
service in QuickBooks Desktop. This can be really helpful and can save
considerable time involved in sending the reports, invoices, and other
documents through emails outside QuickBooks. It is important to ensure that you
have Outlook 2010 and newer versions of the same set up on your system. When
that is ensured, this article will guide you through easy steps to connect
your email to QuickBooks Desktop. So, continue reading.
Advantages of connecting your email to QuickBooks
Connecting QuickBooks with email can be
beneficial in the following ways:
·
Invoices can directly be sent
through QuickBooks via mail.
·
It is now easy to send payment
reminders to customers via emails.
·
Users can easily share data in
the form of spreadsheets through the webmail in QuickBooks.
·
Product list can now be easily
made and subsequently sent to vendors.
·
Saves users the time consumed
while sending emails via the browser.
Procedure to connect email to QuickBooks Desktop
Process 1: Process to set up Outlook to work with
QuickBooks
Contact email provider to get details about
Username, Password, Incoming email server address, Incoming email server type,
and Outgoing email server address.
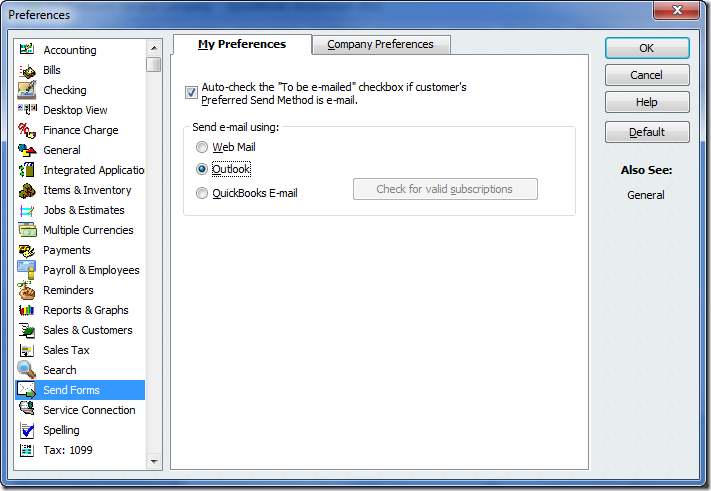
Process 2: Setting up Outlook
·
Run QB, then go to Edit, &
then Preferences.
·
Choose Send Forms, and the Outlook.
Click on Ok.
·
Set secure webmail to work with
QB
Procedure
to set up a secure webmail
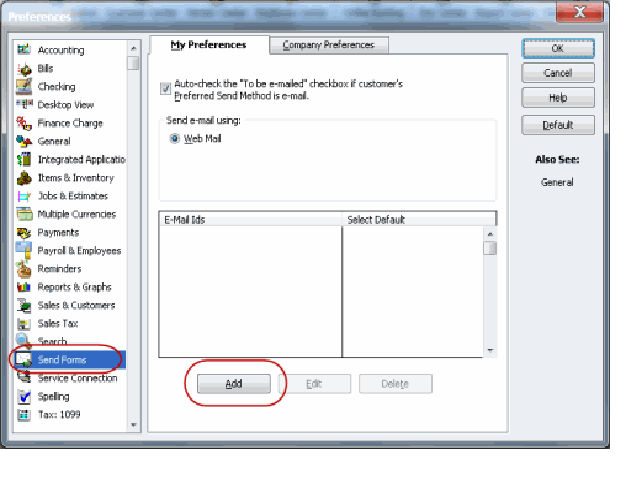
·
Head to Edit menu, then
Preferences, and then Send Forms.
·
Click Web Mail, then hit on Add.
·
Choose the email provider, the
type correct email address.
·
Opt for “Use Enhanced Security”,
then hit Ok.
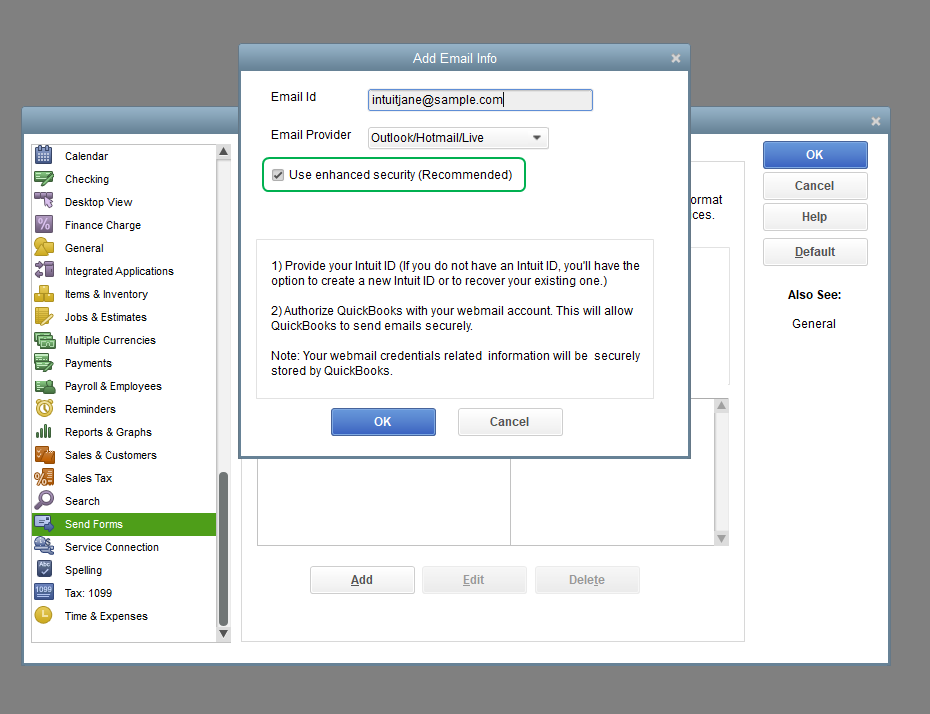
·
When asked, proceed to sign in
to the Intuit account.
·
The webmail login page will show
up. Now, sign in, then grant Intuit access.
Procedure for Setting up webmail to work with QuickBooks
To start with, ensure the following:
·
Check the webmail servers &
port settings.
·
For Webmail providers, enable
account settings for two step verification.
·
Then, proceed as below:
o
Head to Edit, then for
Preferences, and then Send Forms.
o
Opt for Web Mail, followed by “Add”.
o
Incorporate “Add Email Info”,
then click on Ok.
o
In contrast to Secure Webmail, QB
asks users to enter webmail p/w the first time when sending email using
webmail.
The current discussion revealed easy steps
to connect your email to QuickBooks Desktop. To talk to our QuickBooks desktop
support experts, call us directly at 1-800-615-2347.


Comments
Post a Comment