Easy Guide to Resolve Beginning balance issues in QuickBooks Desktop
QuickBooks
users sometimes encounter problems when they try to start reconciling their
accounts. These problems can be caused by incorrect balances in the account or
recent changes made to the account. This article provides simple solutions to
help you fix
beginning balance issues in QuickBooks Desktop. So, continue reading until the end for helpful tips.
Causes of
beginning balance issues in QuickBooks Desktop
The
main reasons for the zero balance or beginning balance problem in QuickBooks
Desktop are:
●
Account not set up properly, meaning the
account balance was not accurately included.
●
Some previously reconciled
transactions were voided or changed.
●
Damage to the company data, causing data
modification and resulting in the beginning balance issue.
●
Converting the QuickBooks company file from a
different version.
Methods to fix
beginning balance issues in QuickBooks Desktop
The
methods to fix the zero balance error in QuickBooks Desktop are:
Solution 1:
Fixing the zero balance
To
start, you need to recreate the opening balance and then proceed with
reconciling the account.
Step
1: Creating a Journal entry
●
Go to the Company tab and select Make General
Journal Entries.
●
Correct the statement date in the beginning
balance.
●
Choose the account from the Account dropdown
menu.
●
Enter the correct opening balance in the Debit
column.
●
Select Opening Balance Equity.
●
Click Save.
Step
2: Reconciling to fix the Beginning Balance issue
Here
is a step-by-step guide to correct the beginning balance:
●
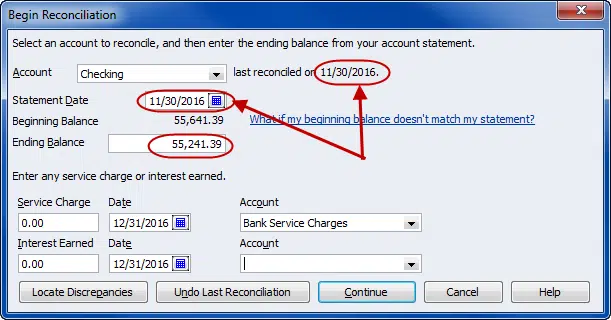
Go to the Banking tab.
●
Select the Reconcile option.
●
Click on the Account dropdown and choose the
correct account.
●
Enter the statement date and ending balance
correctly, matching the Journal Entry.
●
Click Continue.
●
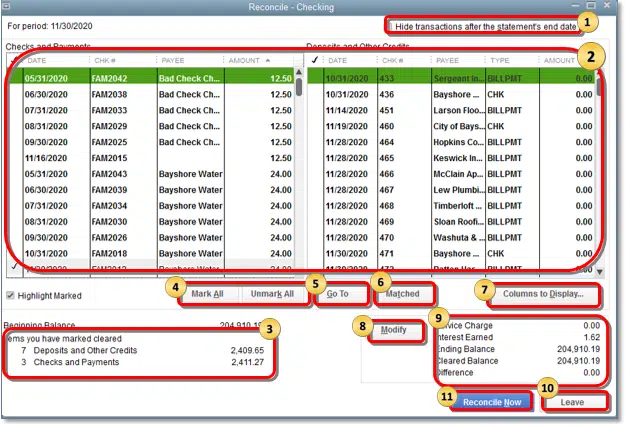
Navigate to Deposits and Other Credits and
select the Journal Entry.
●
Make sure the amount displayed for the
difference is zero.
●
Then, proceed to the Reconcile Now button.
Solution 2:
Fixing an incorrect balance
Step
1: Fixing edited or deleted transactions
To
identify the transaction causing the beginning balance issue, you can run one
of the following reports:
●
Reconcile Discrepancy
●
Audit Trail
●
Previous Reconciliation
Steps to run
the Reconcile Discrepancy report in QuickBooks Desktop
Here
is a detailed explanation of the procedure to run the Reconcile Discrepancy
report:
●
Go to the Reports menu and select Banking.
●
Choose the Reconciliation Discrepancy
option.
●
Select the Account you want to
reconcile.
●
Click Ok. The screen will display a
list of transactions that have been changed since the last reconciliation.
●
Use this Reconcile Discrepancy report
to identify the transaction causing the beginning balance issue.
●
Take note of the date and the Entered/Last
Modified details of the identified discrepancy.
Winding Up!
This
article provided three helpful solutions to fix beginning balance issues in
QuickBooks Desktop. If you encounter any technical problems, feel free to
contact our QuickBooks
desktop error support experts.
You can reach them by calling the helpline at 1-800-615-2347.


.jpg)
Comments
Post a Comment